Managing Expense Approvals
Turn on expense approvals by matter or by professional, manage approvers, submit expense entries that require approval, and approve them.
The Expense label may be displayed as Cost, Disbursement, or Expense depending on your TimeSolv Configuration in Expense>Settings>General. This can change path and report terminology.
The Professional label may be displayed as Associate, Consultant, Employee, Fee Earner, Professional, Resource, Staff Member, and Timekeeper depending on your TimeSolv Configuration in Account>Settings>General. This can change path and report terminology.
The Client label may be displayed as Client, Customer, or Respondent depending on your TimeSolv Configuration in Clients>Settings>General. This can change path and report terminology.
The Matter label may be displayed as Case, Engagement, Job, Matter, or Project depending on your TimeSolv Configuration in Clients>Settings>General. This can change path and report terminology.
Enable Approval Process
Click on Expense>Settings.
Enable Expense Approvals by Matter – if you have an approval system set up at the matter level, you can toggle the approval system on and off from here. Having an approval system means that you can monitor and confirm expense entries made for a specific matter. If you have both Enable Expense Approvals by Matter and Enable Expense Approvals by Professional boxes checked, the matter level approval system will supersede the user level approval system.
Enable Expense Approvals by Professional – if you have an approval system set up at the Account>Timekeeper level, you can toggle the approval system on and off from here. Having an approval system means that you can monitor and confirm expense entries made by a specific timekeeper. If you have both Enable Expense Approvals by Matter and Enable Expense Approvals by Professional boxes checked, the Matter level approval system will supersede the user level approval system.
Automatically Submit Expense Entries for Approval – when a user or an approval matter is saved, it will automatically be sitting and waiting for approval in the approver’s account. If this box is unchecked, a ‘ Submit‘ button will appear on the expense entry screen. The expense entry will not be submitted for approval until the user clicks on the ‘ Submit‘ button.
Notify Approvers via Email – email notification will be sent out to an approver at midnight and then at 8 am to notify them that there are approvals waiting for them. It is useful to note that an approver will not be inundated with emails for each and every expense entered. If this box is unchecked, it is up to the approver to log in and check to see if there is any expense entry waiting to be approved.
Manage Approvers
1. Approvals required for a Timekeeper’s entries
To enable/view ‘ Manage Approvers‘ button in user profiles, approvals must be enabled under Expense>Settings (see above).
Click on Account>Professionals>[name]>Profile tab.
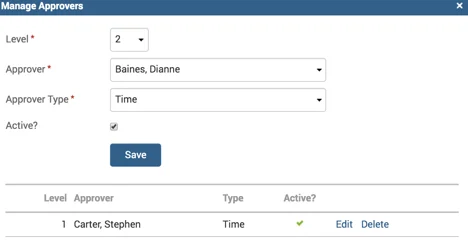
If the accessed user needs their entries approved, click on Manage Approvers.
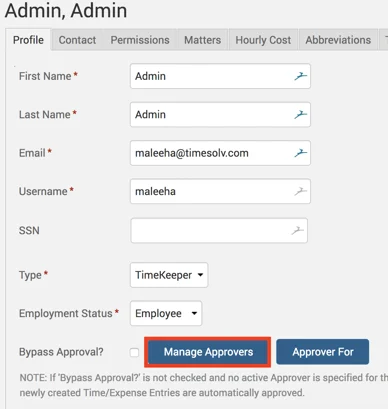
Note: If ‘Bypass Approval?’ is not checked and no active Approver is specified for this Timekeeper, newly created Expense Entries are automatically approved.
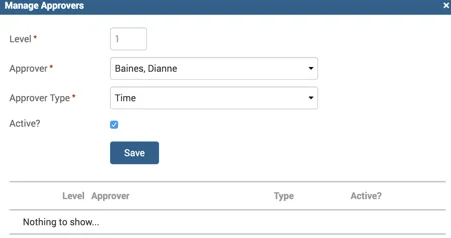
Level – When the Level 1 Approver approves the Expense Entry, it will then be made available to the Level 2 Approver, and so on. You may also have multiple Approvers on the same level number. So, for example, you may have three Approvers at Level 1. One of which will have to approve the Expense Entry before it proceeds to the Level 2 Approver.
Approver – the user to approve entries created by this Timekeeper.
Approver Type – ensure the Approver approves either Time, Expense, or Both Time & Expense.
Edit – edit or deactivate Approver.
Delete – users cannot delete an Approver if they still have Expense Entries waiting to be approved by them.
2. Approvals required for entries against a specific Matter
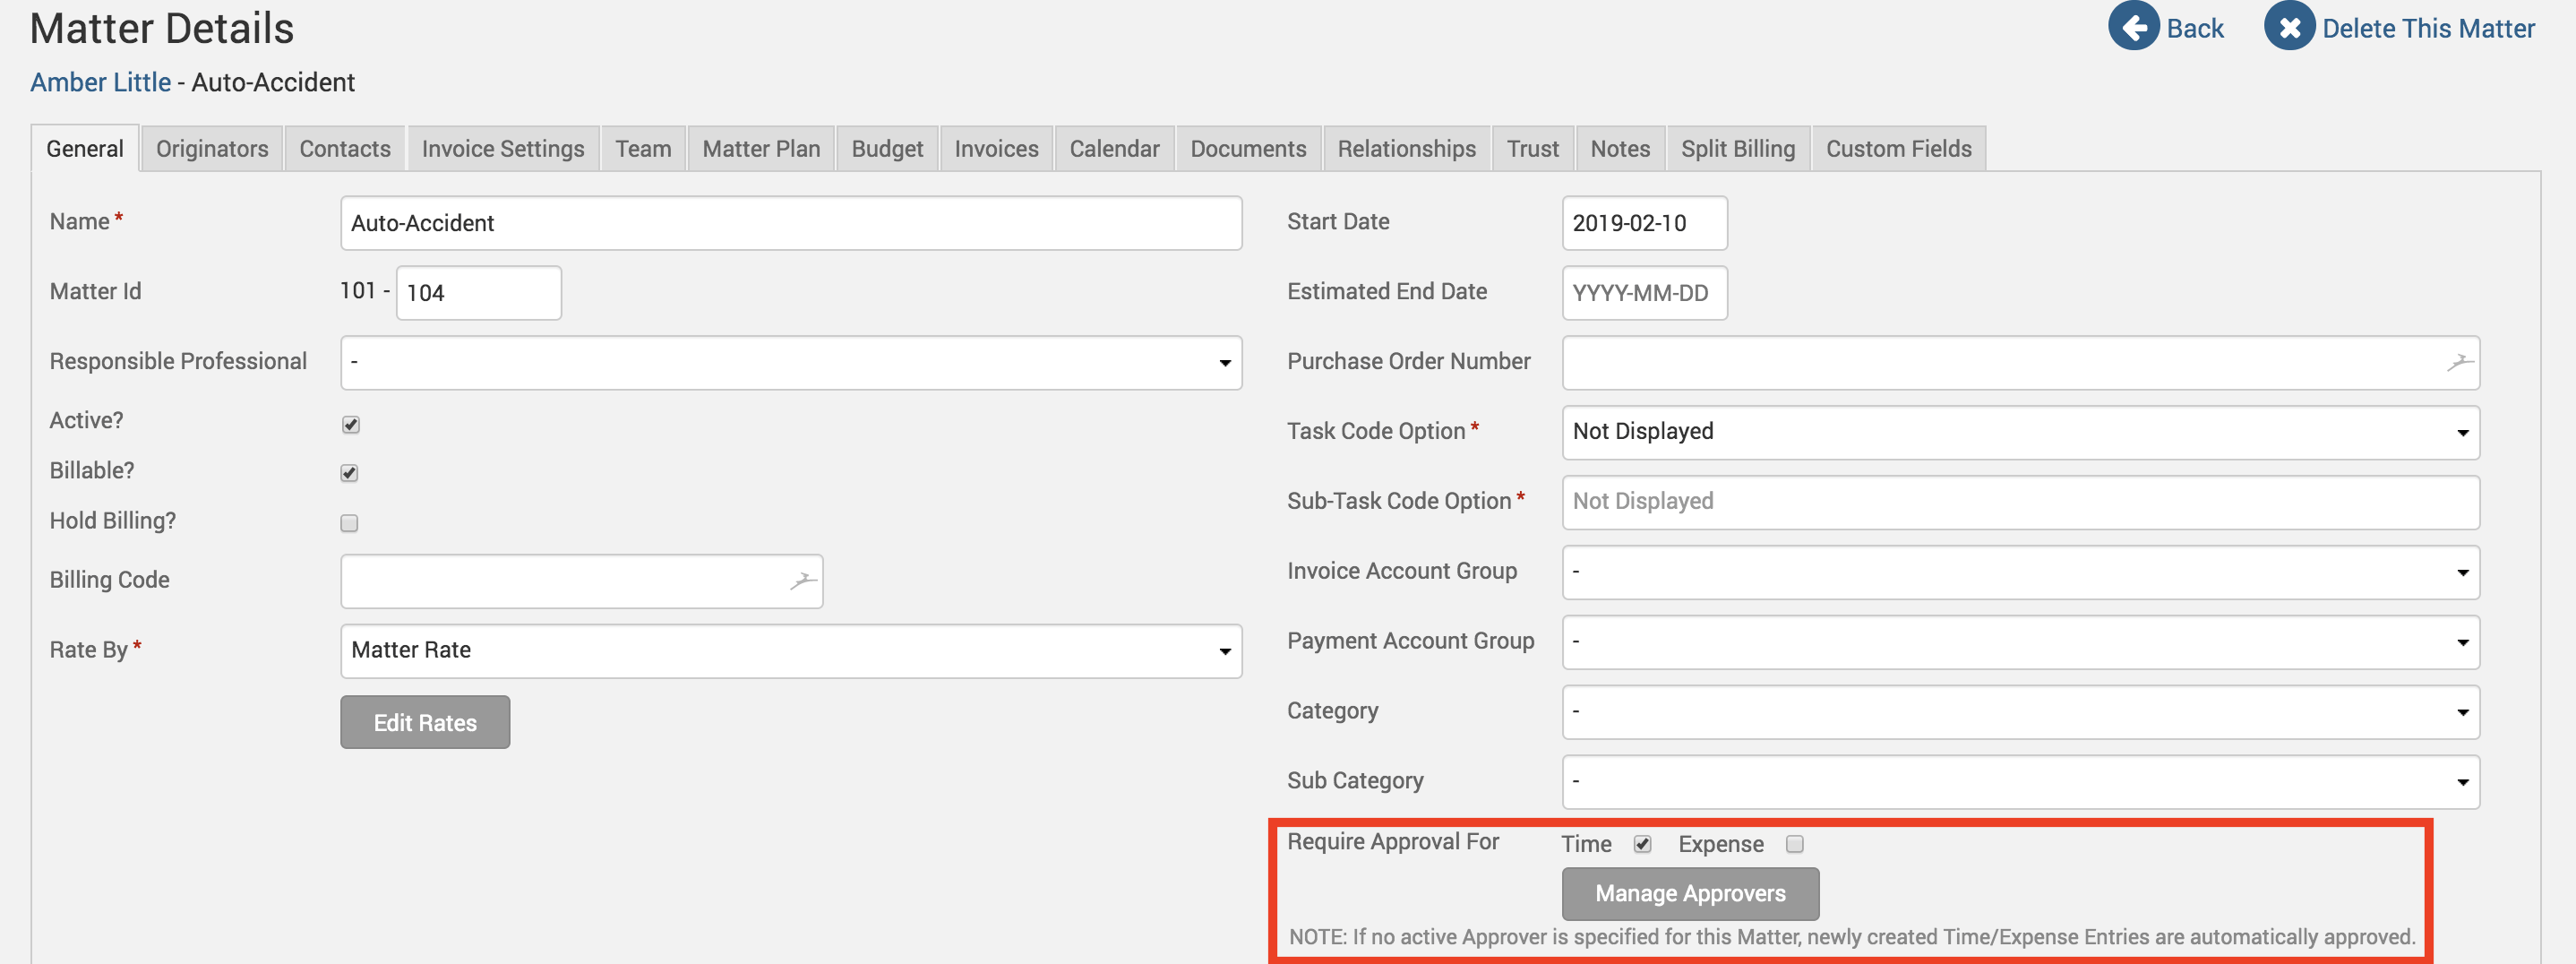
Click on Clients>Clients & Matters>[matter name]>General.
Select whether this Matter requires entries approved for Time, Expense, or both.
Click on Manage Approvers to manage the users that approve entries created against this Matter.
Level – When the Level 1 Approver approves the Expense Entry, it will then be made available to the Level 2 Approver, and so on. You may also have multiple Approvers on the same level number. So, for example, you may have three Approvers at Level 1. One of which will have to approve the Expense Entry before it proceeds to the Level 2 Approver.
Approver – the user to approve entries created by this timekeeper.
Approver Type – ensure the approver approves either Time, Expense, or Both Time & Expense.
Edit – edit or deactivate Approver.
Delete – users cannot delete an Approver if they still have Expense Entries waiting to be approved by them.
Submit an Entry Requiring Approval
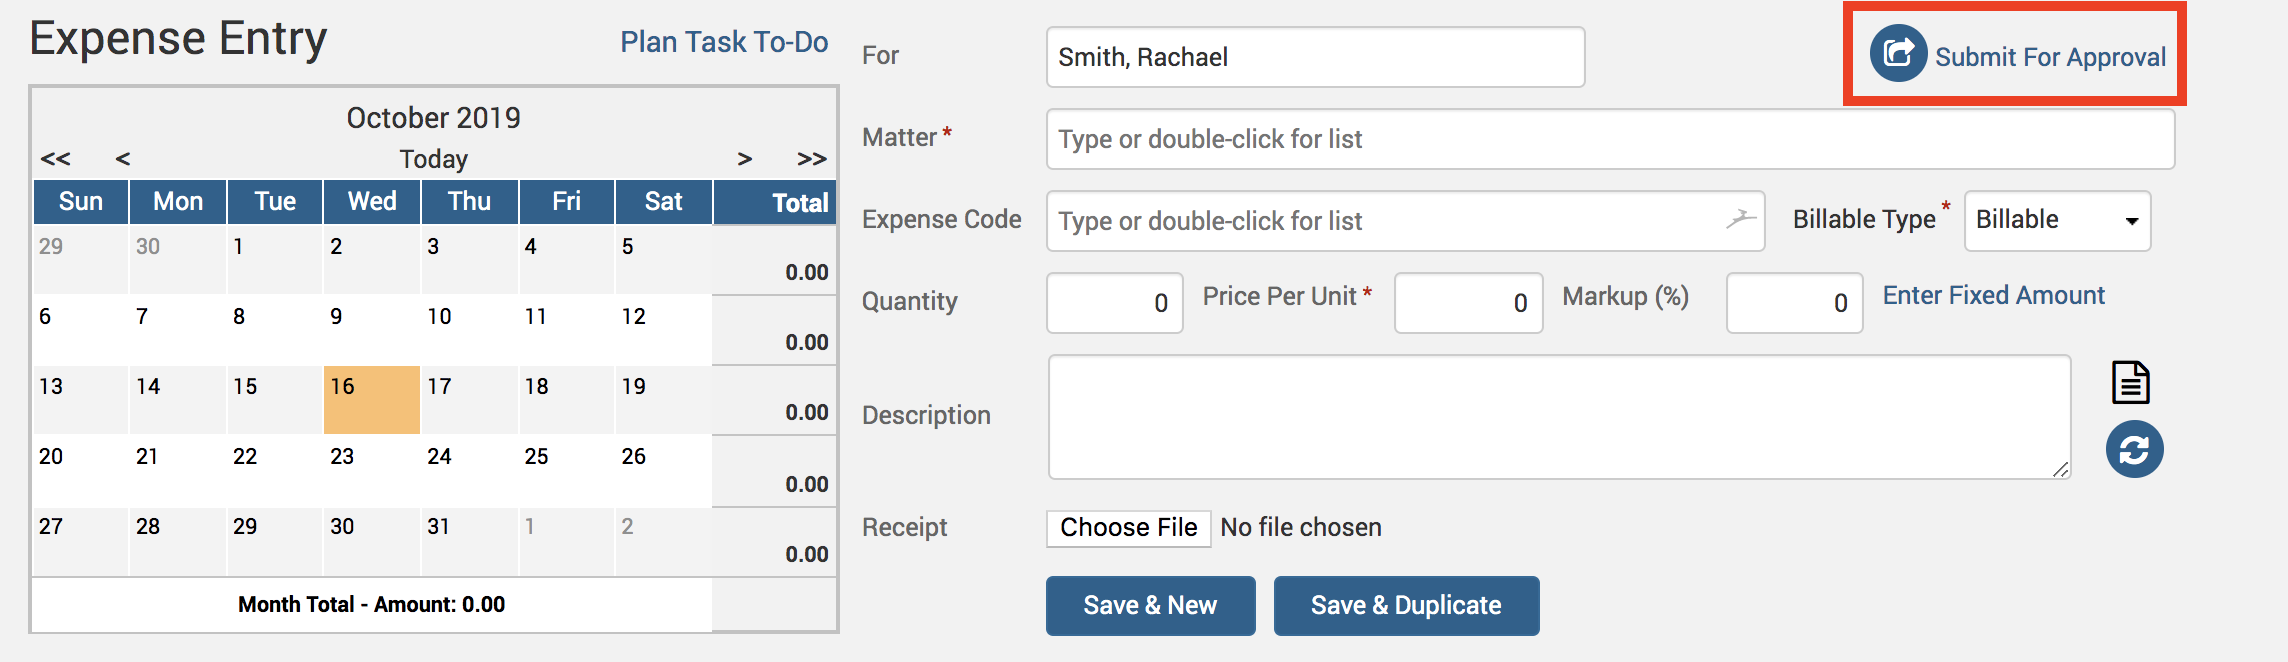
Under Expense>Expense Entry screen, if the user or the matter needs expense entries approved click on the Submit For Approval button after entering expense details (Exemption: if under Expense>Settings>Automatically Submit Expense Entries for Approvals is enabled the user just needs to save the entry and it will automatically be submitted to the listed approvers).
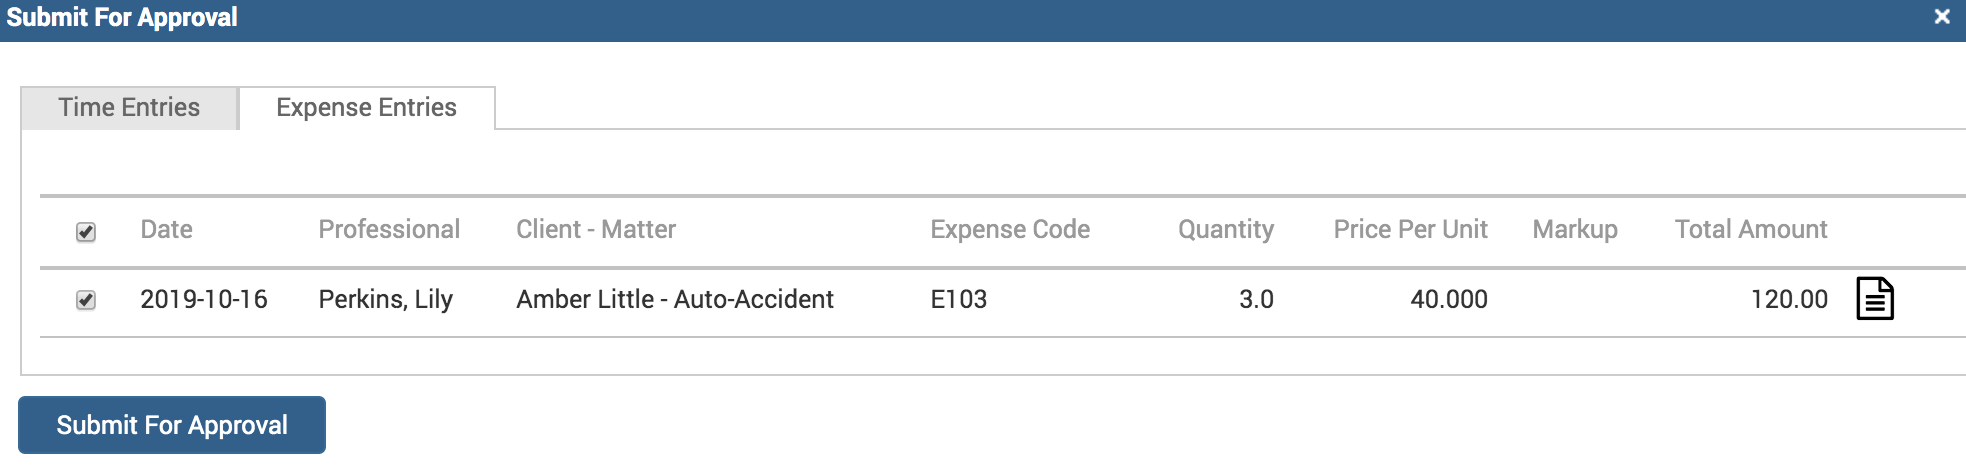
Users can submit entries for approval in bulk by marking checkboxes.
Approve an Expense Entry
Note: an Admin user can approve Expense regardless of whether or not they have been listed under the Approvers list.
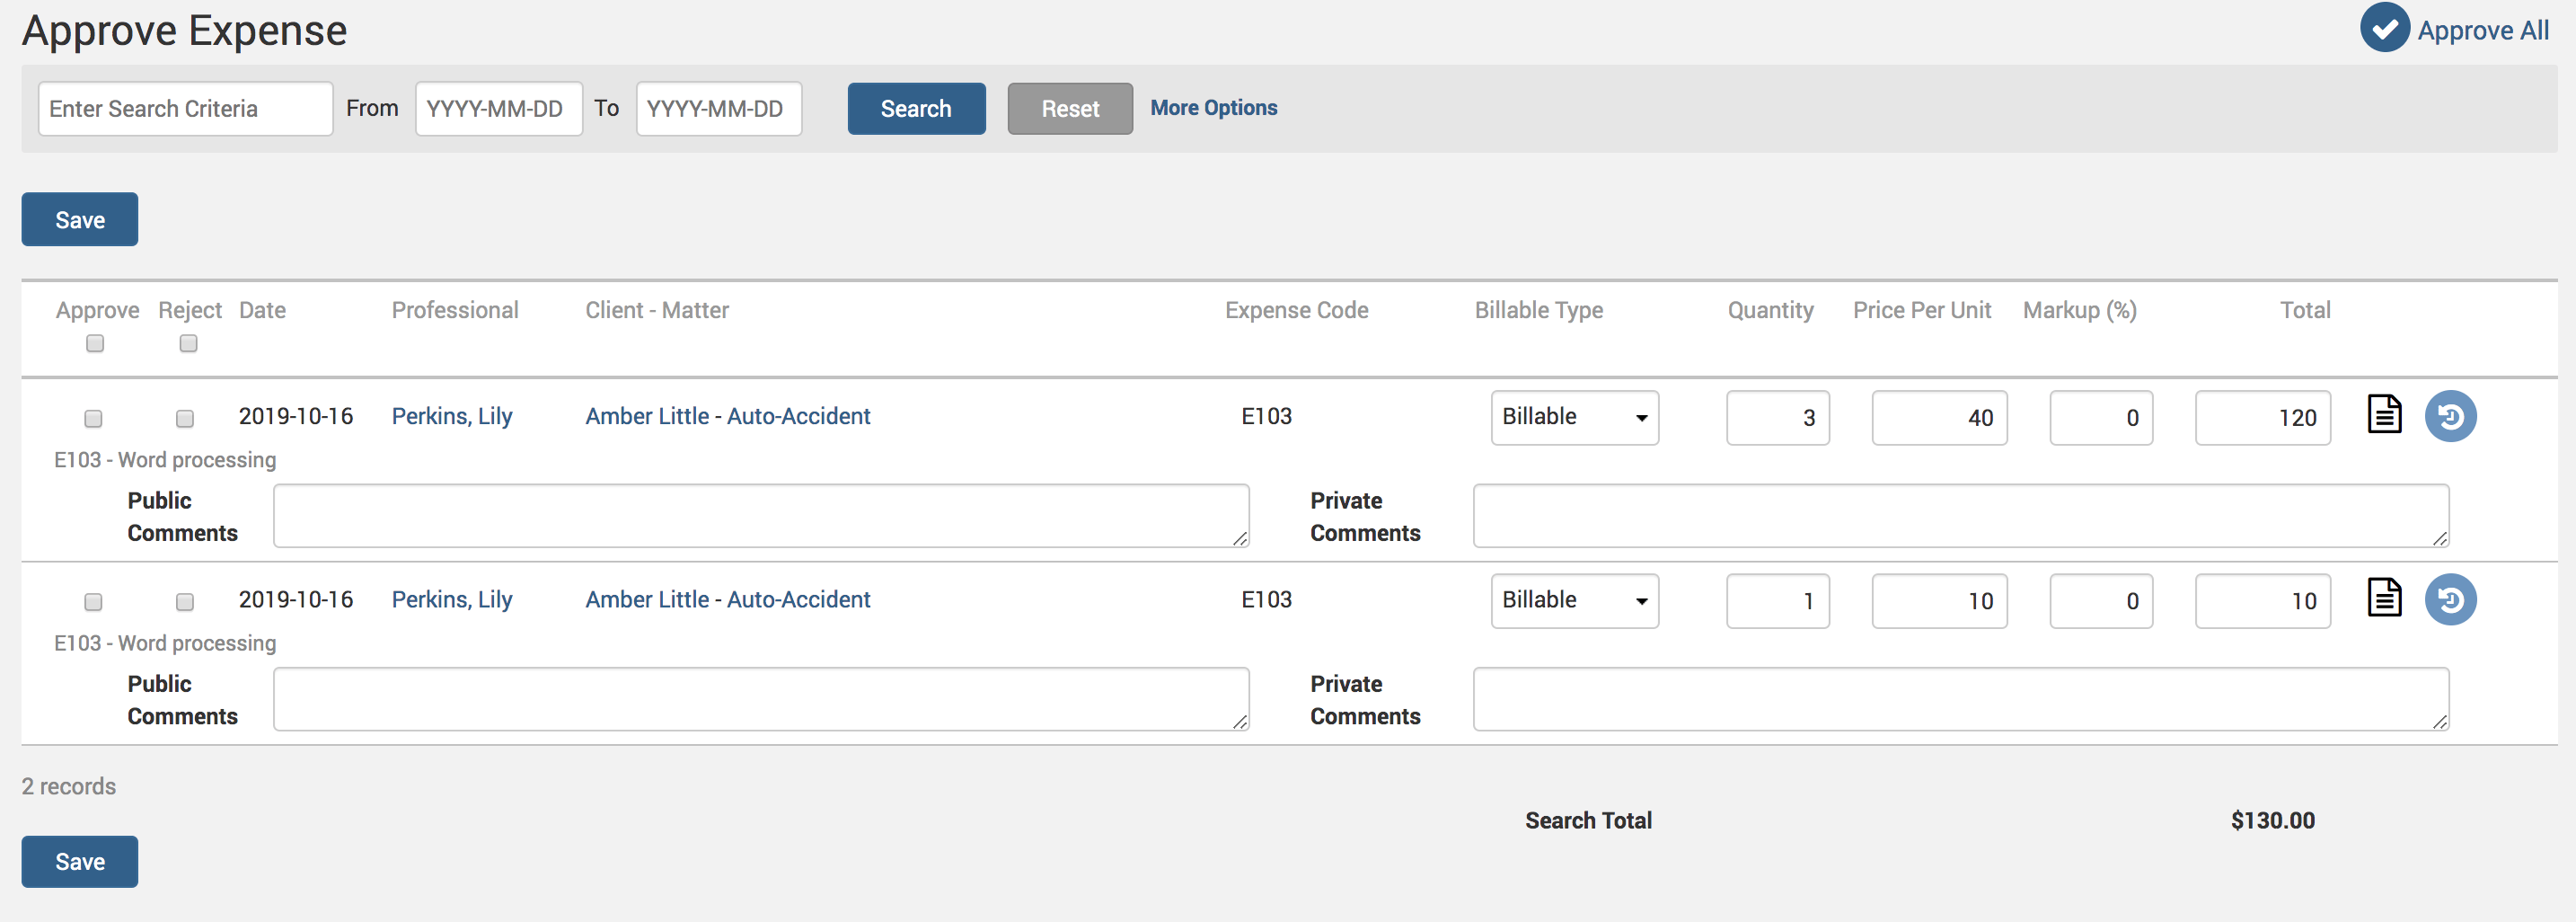
Click on Expense>Approve Expense.
Note: this link is visible only to those timekeepers who have been marked as the expense approver in the Manage Approvers section.
Note: if the user is an Administrator, they will be able to see both Public and Private comments.