TimeSolv Integration with NetDocuments
Connect NetDocuments by choosing a server region and cabinet, set up workspace view with Client and Matter attributes, and fix internal server errors.
NetDocuments Integration
Click on Documents>Settings.
Click on Configure NetDocuments.
Select Server Region.
Click on Connect to NetDocuments button.
After successful authorization, cabinet selection and verification that the selected cabinet has Workspace view enabled and configured, a folder will be created in NetDocuments for every active Client and Matter in TimeSolv. Any existing data (i.e. Client, Matter, default folder and files) will be visible in TimeSolv.
Sign into your NetDocuments account.
Note: any files uploaded to NetDocuments from TimeSolv will appear as if they were uploaded by the person whose login credentials were used to authorize TimeSolv to connect to your NetDocuments account.
Workspace View Configured Already
If you already have setup workspace view in your NetDocuments account, please verify:
1. You have enabled workspace in a cabinet and the workspace is based on a profile attribute.
Available in Admin>Cabinets>Selected Cabinet>Defineworkspace templates.
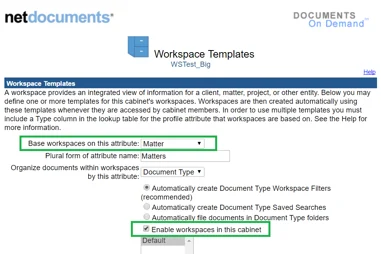
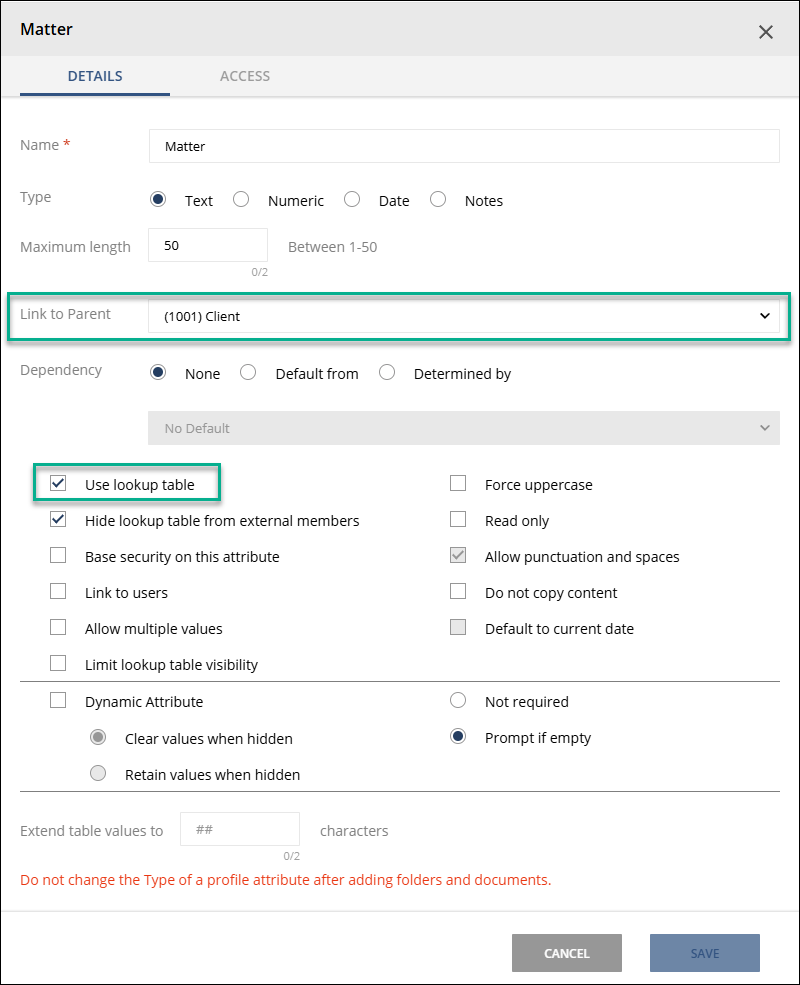
2. The profile attribute the workspace is based on uses lookup tables and has been linked to a parent profile attribute which also uses lookup tables.
Available via Admin > Click the Hamburger in upper-left > Profile Attributes > Click the Profile Attribute > Click the Gear icon in the upper-right.
Configuring Workspace View
Here is how to setup workspace view in NetDocuments:
-
- Setting up Profile Attributes:
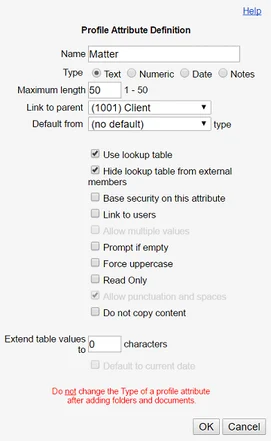
Go to Admin>Define profile attributes and define two attributes Client and Matter as shown in the screenshots below:
Note: It is not necessary that you name them Client and Matter. You can use any names. It is recommended that you use Client and Matter.
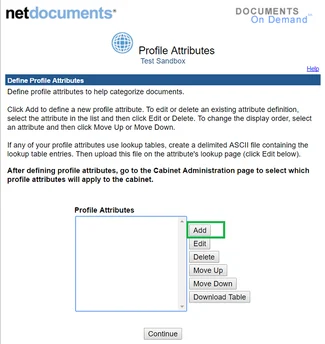
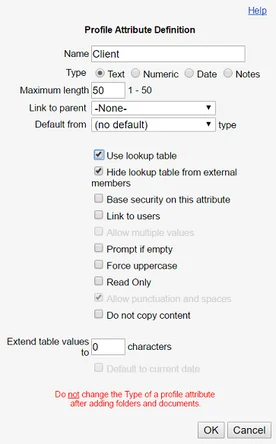
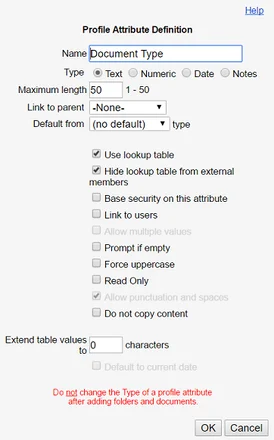
Add another profile attribute named ‘Document Type‘ if you want to see default folders under each Matter.
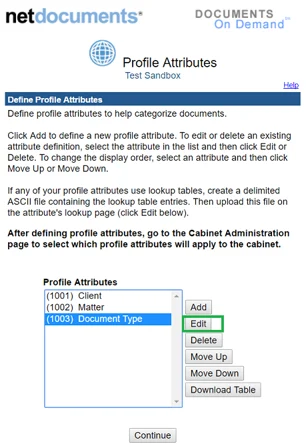
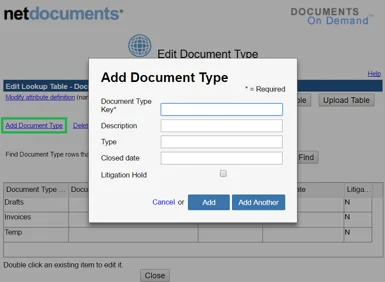
Edit ‘Document Type‘ profile attribute to define set of default folders.
2. Configuring Cabinet:
From Admin>Cabinets, click on ‘Add Cabinet’ to create a new Cabinet.
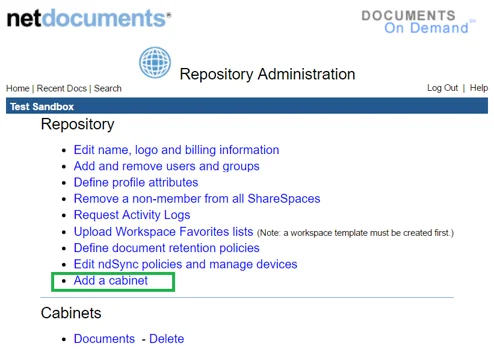
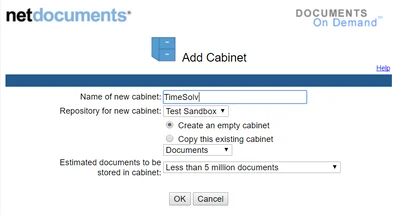
2.2 From Admin>Cabinets, click on the TimeSolv cabinet to configure it.

2.3 Click on Define workspace templates to select base profile attribute for the workspace.

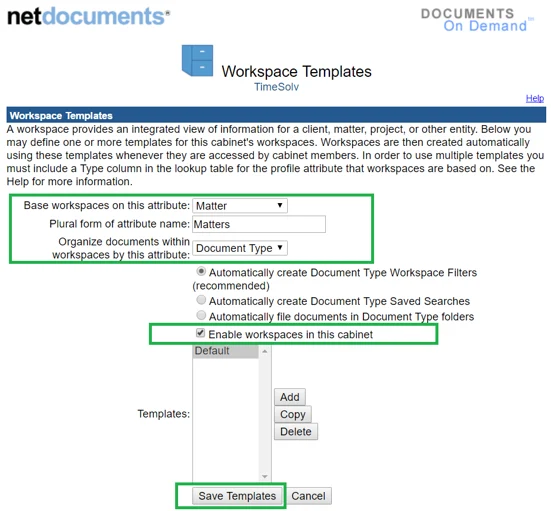
2.4 Set up Client-Matter titles in NetDocuments as shown below. Remember to click the Save Templates button (above) afterwards.
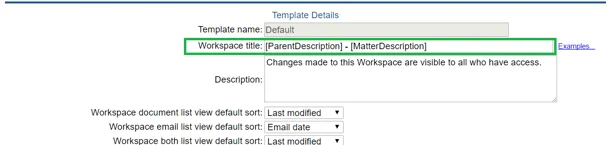
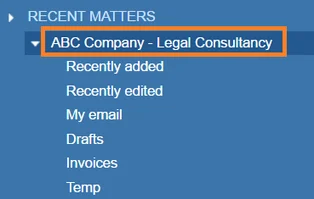
It shall show the client matter names as shown below:
Internal Server Error Related to NetDocuments
“Internal Server error displays if a user tries to reconfigure NetDocuments.”
When users Revoke Access for TimeSolv from within NetDocuments website, the following error message is displayed:
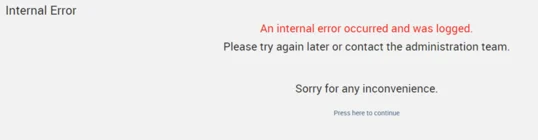
The user will be led to a page where they can configure NetDocuments again.
Note: There is a lag time when a user Revokes Access of TimeSolv from within NetDocuments. The AccessToken is no longer valid whenever TimeSolv sends a service call. During this time all operations will remain valid, i.e. a new document is created and updated in NetDocuments.
How to setup Cabinet Workspace in NetDocuments
There may be isolated instances where Matters do not show up in TimeSolv. This happens because the syncing process is an async process, where Clients/Matters syncing takes place simultaneously with items queued for processing.
If the items in the queue get stuck due to a bandwidth issue or for some other reason, you may see unsynced items.
Syncing issues also occur if NetDocuments does not have Workspace configured correctly in both TimeSolv and NetDocuments.
Follow the steps below to see if the settings are correct.
Settings in TimeSolv App
As a first step, disconnect and reconnect to NetDocuments from TimeSolv App and see if the Matters have synced. This is in case of processes held up, as mentioned in the previous section:
- From the TimeSolv App, disconnect from NetDocuments using the grey ‘Disconnect from NetDocuments’ button on the TimeSolv>>Documents>>Settings>>General screen.
- Reconnect to NetDocuments
- Select the Workspace Cabinet from the dropdown. Usually, if the Workspace Cabinet is not selected, the syncing process won’t work as this is a prerequisite in the syncing process.
- Select the Profile Attribute. This is not a prerequisite but will ensure proper syncing between TimeSolv and NetDocuments.
- Use the ‘Sync Client / Matter Folders inNetDocuments’ to initiate the syncing.
You should be able to see the folders synced.
If not, check for configuration settings in the NetDocuments portal described in the next section.
Setting Up Cabinet Document Attributes in NetDocuments
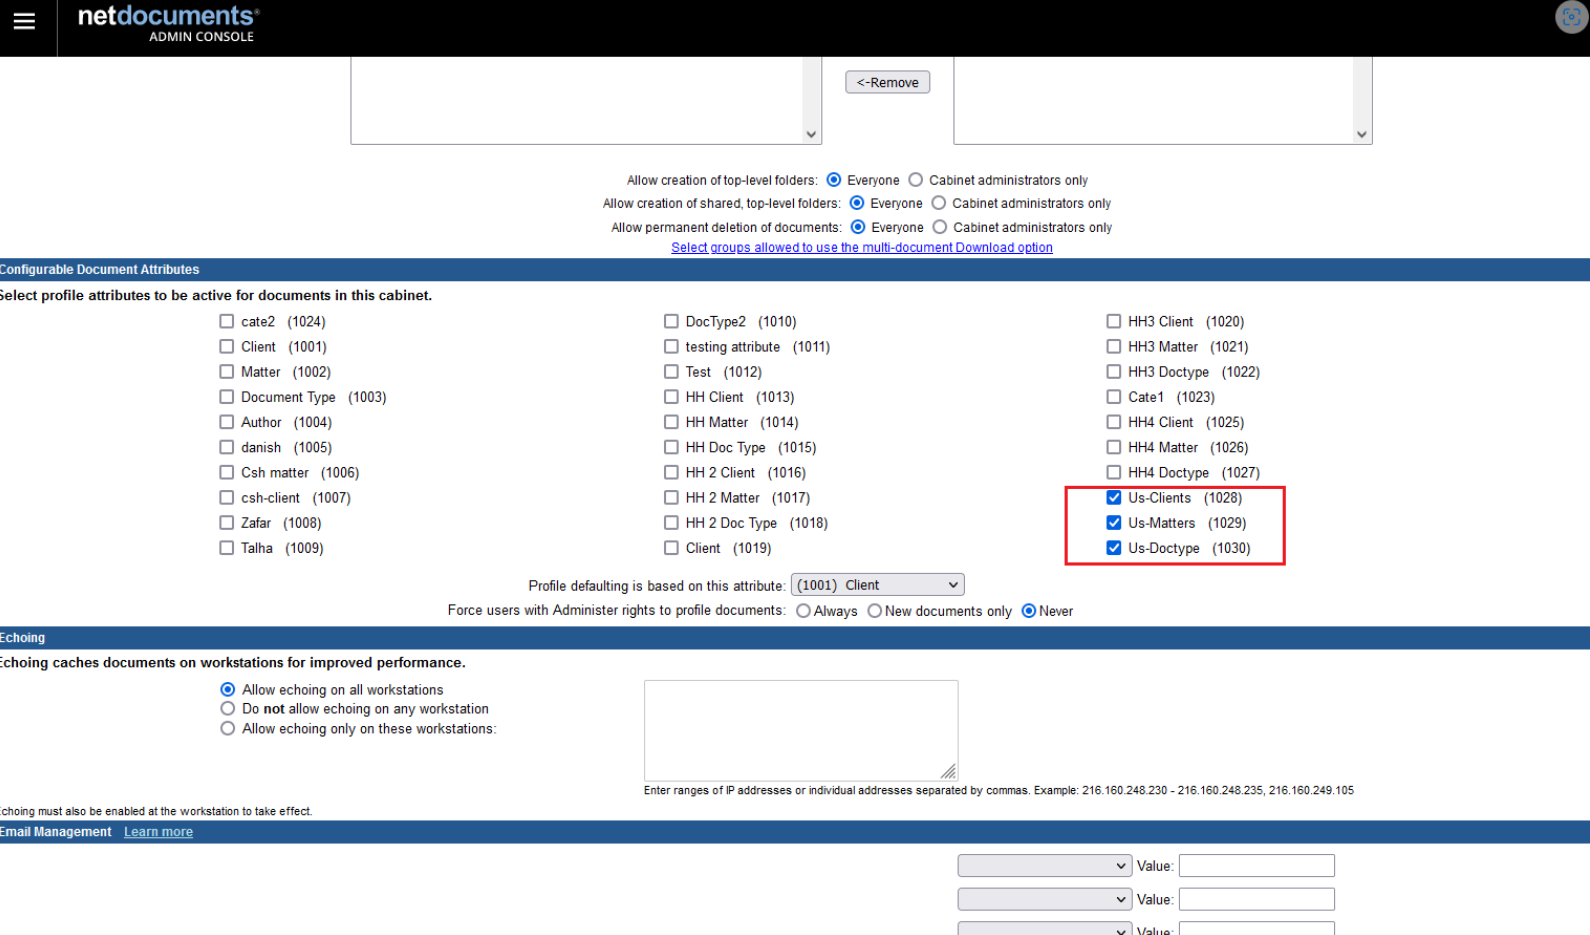
Login to the NetDocuments account and select the desired cabinet. Scroll down to the ‘Configurable Document Attributes’ section.
Ensure that the Matter Profile Attribute is associated with the Client Profile Attribute for the syncing process to work correctly.
The configuration in NetDocuments should be set up as shown below:
1. Cabinet Document Attributes
2. Matter Profile Attribute Association with Client Profile Attribute
Next, from the left navigation, select Profile Attributes and click the Create button to create your new Profile Attribute.
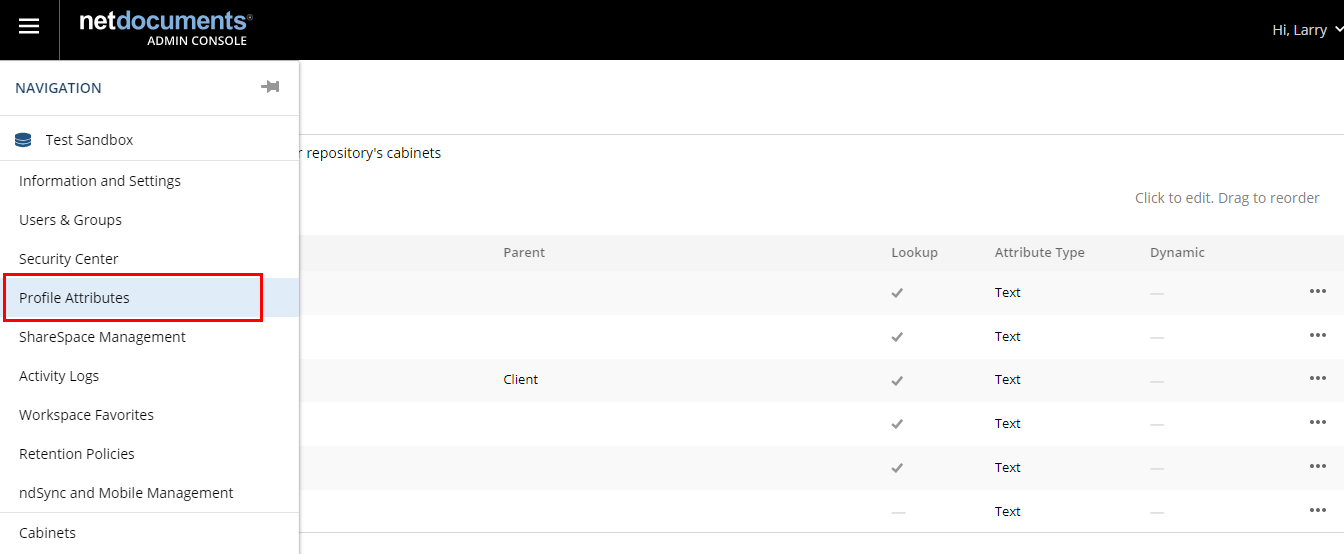
Enter the appropriate Document Attribute and the Client Profile Attribute in the ‘Name’ and the ‘Link to Parent’ fields, respectively.
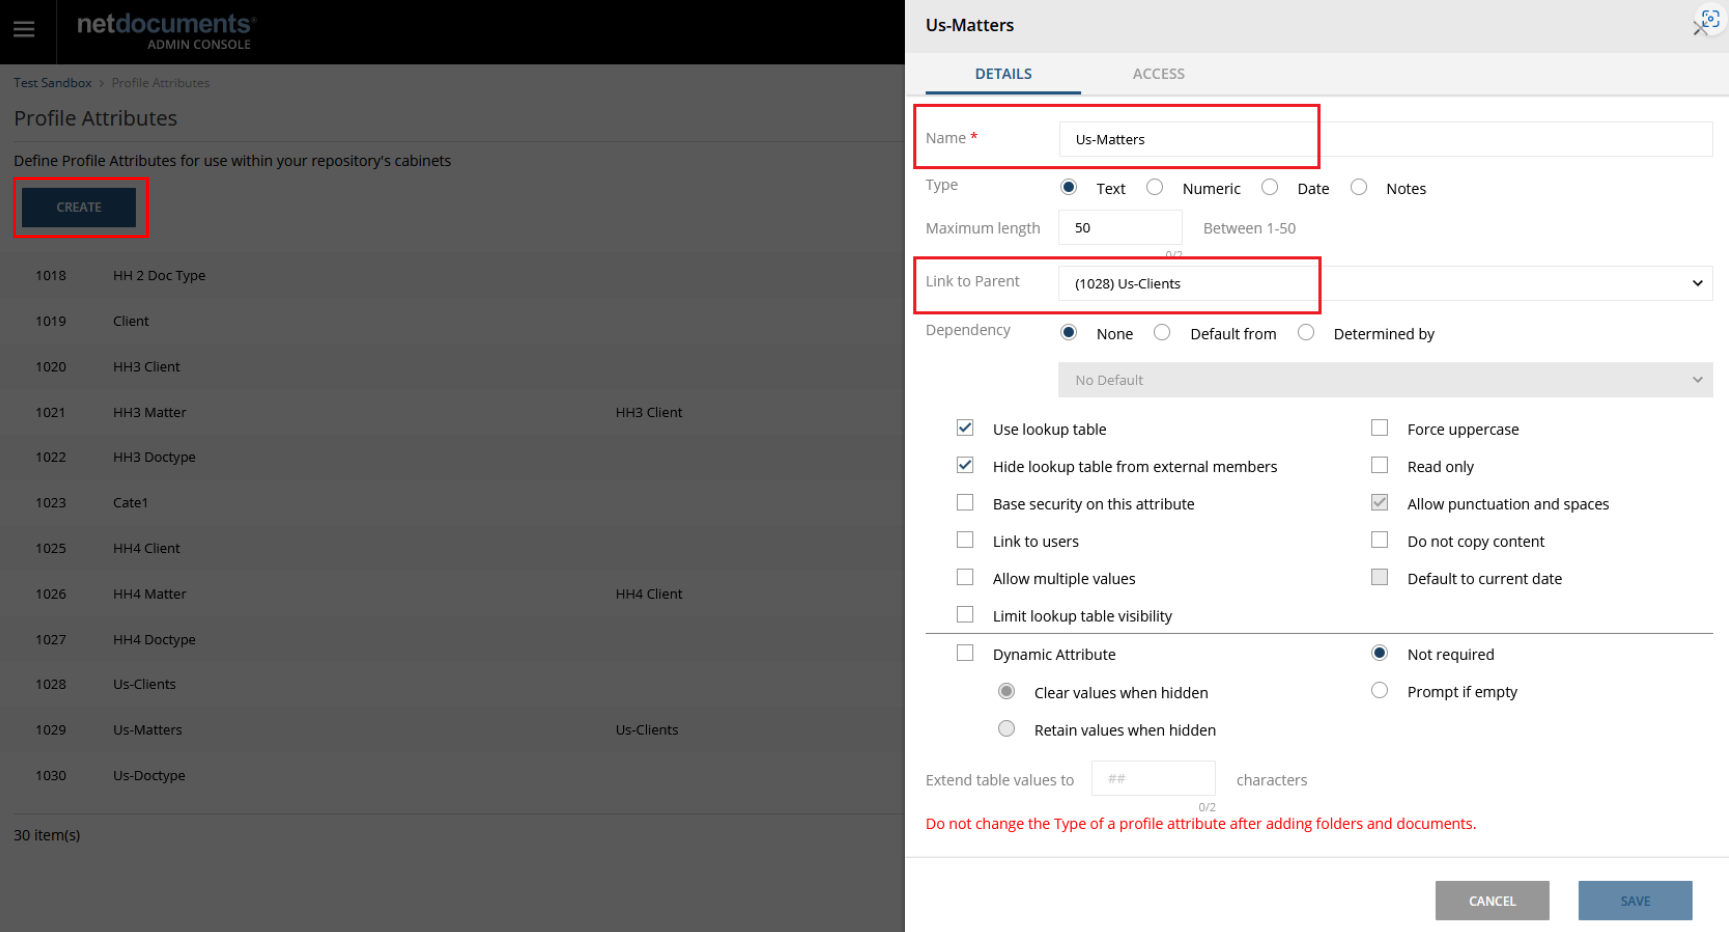
With the above settings properly in place, the syncing process should work.
If you still face issues, please get in touch with TS support for further assistance.